Showing posts with label Nik Collection Software. Show all posts

Thursday, 22 February 2018

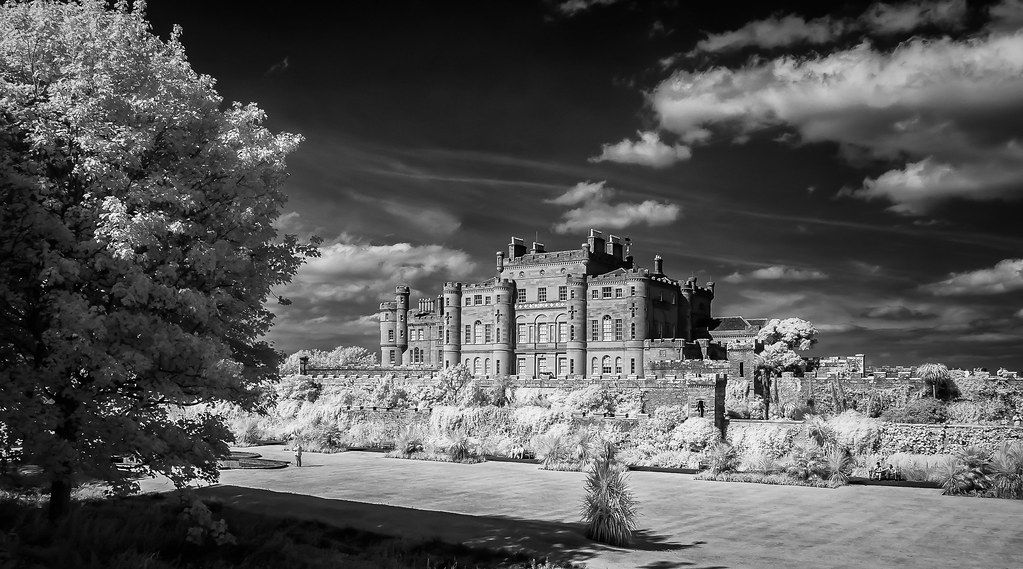
My current processing workflow for black-and-white infrared photography

I now have a standard protocol (workflow) for producing black-and-white images from my infrared-converted cameras. It is very simple and allows adjustments and corrections at all stages.

In Lightroom Classic, in Basic, I select Black & White then Auto Tone. Then I take the image to Silver EfexPro2. I usually use the preset High Structure Smooth or High Structure Harsh. Then, after making adjustments, I go back to Lightroom to make further general or local adjustments to finish the job, usually leaving noise reduction and sharpening until the end.

Those simple steps suit Raw images from my converted Nikon D80 with a 590 nm filter and my Nikon D7100 with 720 nm filter, or either camera with an 850 nm filter over the lens.

Here, as they say, is one I made earlier:


Culzean Castle

Monday, 12 June 2017

My current processing workflows for ‘faux’ colour Infrared photography with DSLRs

Readers of this blog will be aware that I have tried all sorts of different software and ways of processing ‘faux’ colour images from infrared-converted cameras. I came across the superb article* by Bob Vishneski here on the photographylife website and found his method to be the best, with a second (which he also describes) as a back up to provide greater flexibility on occasion. Both use Lightroom and Photoshop CC plus Nik Collections Silver EfexPro. Both depend on using RAW images.

At present I have two infrared-converted cameras. The first is a Nikon D7100 with a 720 nm filter; the second is a Nikon D80 with a 590 nm filter. Bob Vishneski makes the point that different camera/infrared filter replacement combinations need different settings. His preset developed for his D7100 with 720 nm filter from Kolarivision works fine with images from my D7100 with 720 nm filter (I do not know who did the conversion). I was able to modify the settings for that preset to use with images from my D80 with 590 nm filter simply by moving the Tint slider.

Because there may be months between sessions of processing infrared photographs I like to keep a note of my current standard methods (‘workflow’ in photography-speak; ‘protocol’ in a laboratory).

Vishneski Preset at Import Method


For those who want to use the Vishneski Preset at Import Method, which uses presets on import into Lightroom I show my protocol and the presets below. I cannot say standard protocol because there are stages in it where the final appearance can be affected and experimentation is possible. I do not describe some of the whys and wherefores, adding ‘structure’ with a luminosity blending mode overlay from Silver Efex Pro, for example because they are covered in the Vishneski article.

Camera Calibration Profile Method


The second method I had used before reading the Vishneski article. The Camera Calibration Profile Method relies on using an Adobe Custom DNG Profile for the camera/filter combination that can be applied in the Camera Calibration section of the Develop module in Lightroom before sending the image to Photoshop for the Channel Mixer stage to be applied. Like Bob Vishneski I found little difference between the two methods for the D7100/720 but that with the D80/590 the Vishneski Preset method (using my own tweaks for that combination) produced better results with ‘cleaner’ colours after the Channel Mixer stage in Photoshop. Using a custom DNG profile does have one advantage: in Lightroom, the white balance can be shifted by the Temperature and Tint sliders or by picking an area on the image to set a white balance (e.g. glass or foliage in sun, grass in shade, tarmac in sun, tarmac in shade etc) with marked effect on the image that emerges after the Channel Mixer stage in Photoshop.

Photoshop Channel Mixer Settings


Bob Vishneski has published two Photoshop Channel Mixer settings (shown below). The second one is here; I will not deal with the rest of that second article here suffice it to say that I have tried both of his and compared them with the traditional simple red-blue channel swap. I use what I have called his Type 1 channel mix for the D80/590 combination using both methods in Lightroom (results are better than the conventional swap and the Type 2 channel mix) and the Type 2 mix for the D7100/720 combination, again for both the Preset at Import Method and for the Camera Calibration Profile Method. I have all these Channel Mixer Settings set up as Actions in Photoshop along with the addition of a (Auto) Curves and Hue/Saturation Adjustment Layers.

Workflows


Here are my Workflows or Protocols for the two methods:


Presets for the Preset at Import Method


Preset for my converted D7100-720 nm IR Filter

Preset for my converted  D80-590 nm Filter

*It is worth reading (and ignoring some of the inane) comments at the end of the article.

Tuesday, 28 July 2015

Infrared Processing in Lightroom

If you have your RAW image from an infrared converted camera in Lightroom, having to go to Photoshop or Photoshop Elements with Elements+ to swap the red and blue channels is a pain. When I made the move from Aperture to Lightroom 6, I was delighted to find, in a Google search, Jarno Heikkinen’s solution to the problem on his Capture Monkey website. His download provides Camera Calibration Profiles with reversed colour matrices for a number of cameras. To reiterate, it simply extends the profiles available within Lightroom. It does not, of course, work for jpegs.

I also remembered that Jason O'Dell had described an approach similar to, but easier than, changing Hue in Nikon Capture 2 using Viveza 2 (I have Nik Software as a plug-in for Lightroom).

I thought I would compare the basic conversions using these three methods. The starting point was a NEF image from a converted Nikon D80 with a 590 nm filter over the sensor.

As you can see there are differences from the same raw image. All I have done is to apply the conversion and then in Lightroom use Auto Tone. I have not done any further processing.

A Lightroom 6 to Photoshop Elements with Elements+. Red/Blue Channel Swap. Auto Tone in Lightroom

B Lightroom 6. Camera Calibration Profile Red/Blue Swap (Jamo Heikkinen). Auto Tone in Lightroom

C Lightroom 6. Edit in Viveza 2. Near 180 degree shift in Hue. Auto Tone in Lightroom


I then did a simple black-and-white conversion within Lightroom and these are the results:


Which method you prefer depends on the final look you are trying to achieve and how easy it is to get where you want to be. Each provides the starting point for further processing both in colour and black-and-white. For most purposes, particularly black-and-white, and at the moment I think I can manage with the wholly within Lightroom solution of Jarno Heikkinen, although for some faux colour images I rather like the Viveza 2 process. Whether or not I can manage completely without the channel swapping step in Photoshop time will tell as I try images with the different cut-off filters over the sensors of my converted cameras, with different white balance settings, with additional external filters and with different lighting.

Sunday, 3 May 2015

Out with Aperture; In with Lightroom

Being completely underwhelmed by Apple's new Photos application, I grasped the nettle and bought the new version of Lightroom, Lightroom 6, as a download from Amazon. I strongly resented having to do so because the seamless link between Final Cut Pro X and Photos or Aperture for moving stills into video is (was) something I use often. With Aperture having been discontinued and withdrawal of support in the offing, my hopes were resting on Photos having plug-in routes to Photoshop and Nik Software etc. But no, the dumbed down, noddy-in-toyland Photos has no such feature. That may come in the future but given such a poor start I cannot see many photographers bothering to wait. And if it is planned to have features added in the future, why release the program now? Have Apple learnt nothing from the incomplete-at-launch Final Cut Pro X debacle?

I had Lightroom 6 downloaded and installed in under 15 minutes (we do have pretty fast broadband here). I tried the automatic Aperture to Lightroom transfer but I did not want the file structure being set up, cancelled the process, deleted the photographs in Lightroom and the files in Finder. and started all over again—this time manually. A rough estimate was that it took 12 hours to export each event from Aperture to a new file and to then import the contents of that file into Lightroom.

I am getting to grips with Lightroom. Thus far I have not encountered any problems, other than the internet link to Help being dead. The lens correction list appeared to be measly until I found the way of finding and downloading other lens corrections profiles. This I did for two of my much-used Nikon lenses.

I have Photoshop Elements as the main external editor and Nik Software plug-ins installed. There is a choice of secondary external editors; I have Nikon Capture NX2 at present because it provides my secondary means of channel swapping infrared photographs.

To sum up so far. Can I do all I wish to do with normal (i.e. non infrared) photographs or scans? Yes. Can I use workflows from Lightroom to process infrared images using either Photoshop Elements and Elements+ or Capture NX2? Yes. Can I apply lens corrections in Lightroom 6 that I previously used PTLens* to achieve? Yes. Can I use the noise reduction software in Lightroom or the Nik suite to improve scans of prints on 1950s textured paper that I previously used Neat Image to achieve? Yes.

The only feature I have lost is the direct import of stills into Final Cut Pro X. For that I shall use, in part, the new video plus stills import option in FCPX. For convenience, I will have to export some stills from Lightroom and import them either into Photos or Aperture.

Changing from Aperture to Lightroom does offer the opportunity to use LRTimelapse instead of my current workflow (which does involve steps in Aperture) to make Timelapse videos using my Nikon D700. The procedure looks powerful if a little complicated but if LRTimelapse works as well as is promised, then the move to Lightroom will bring an added bonus.

So, Aperture now lies unused in my Applications Folder while Lightroom 6 joins Photoshop Elements, Final Cut Pro X and Motion in the Dock. After a quick look, is Lightroom 6 better than Aperture 3? In many ways it is but in some ways, Aperture had the edge.

*PTLens and other programs can be used as the secondary editor if needed, as can other well-known image-editing software.


Thursday, 23 October 2014

Infrared photography with a point-and-shoot Panasonic Lumix DMC-FH27

On trying digital infrared photography for the first time I bought on eBay a simple IR-converted point-and-shoot camera, a Panasonic Lumix DMC-FH27. In some ways it was an easy and fairly cheap means of seeing what was possible. For example, custom white balance is very easy to set. I found a lens hotspot at the wide end (5 mm) of the zoom but that disappeared at longer focal lengths). The biggest problem is noise. Within the sky or clouds, there is very marked noise even at the lowest ISO settings. In fact, the noise is so bad that attempts to change the hue of a particular colour chosen by the eye-dropper tool often failed and all efforts to apply colour control points in Nik software failed miserably. Moreover, the colour rendition of foliage was not what I had expected.

I should, of course, have read the Kolari Vision website before I bought it. This is what it says:

Most Panasonic cameras take photos with a more saturated, distinctive blue color. Their flash tends to mess up the custom white balance, and some high resolution sensors can have a distinct noise pattern. Another thing to note with these cameras is that the 590nm and 665nm filters tend to come out stranger, with the leaves being more red than yellow, and skies becoming somewhat green.

I then moved on to IR-converted DSLRs and my FH27 has been put aside with the hope it would fit in my pocket when shooting video or normal photographs so that I did not have to carry several heavy camera bodies.


A couple of weeks ago I it caught my eye and I wondered if I could find some way of overcoming the processing problems I had encountered earlier. I thought I would try, as a first step, to reduce the noise. This I did using Nik’s Dfine 2 (Aperture plug-in), first applying the basic, global adjustment and then using control points to either increase or decrease the noise (the latter when I wanted to retain detail). Then, I returned to Aperture and took the image to Photoshop Elements/Elements+ to swap the red and blue channels. I also added a hue/saturation adjustment layer to shift the overall hue as necessary. Then back to Aperture and Viveza 2 where I hoped I would be able to use control points as well as global levels and curves adjustment. I could and was, therefore, able to process images to achieve the ‘look’ I wanted, using the full panoply of controls available. A return to Aperture and then a visit to Sharpener Pro 3 where I applied only sharpening to control points where I wanted to see crisper detail. Global sharpening was not applied in order to retain the noise reduction I had obtained at the first step.
Screen grab from the loupe in Dfine 2 showing before
and after global noise reduction
That is the workflow or standard protocol I am applying to the jpgs from the FH27 (no raws on this camera alas).

Some of the older websites describing infrared techniques I found did suggest that for some small cameras noise reduction might be necessary to satisfy those photographers who did not think noise added to the atmosphere of infrared images. They suggested Neat Image, for example, which I have used to good effect for scanned prints on textured paper (post 22 December 2013). However, noise reduction software that offers local control rather than a simple global coverage is of a great advantage for the present application. Dfine 2, offers local control points and colour ranges to obtain selective noise reduction. By using Dfine 2 for the first step, I have been able, after that, to follow my standard workflow used for images from my Nikon DSLRs (16 October 2014).

A before and after sky area from a processed image showing the noise reduction
So would I recommend the FH27 as an infrared-converted camera? I cannot say that I would. A converted Nikon D70 or D80 body can be bought for not that much more and the small sensor with a large number of pixels (the pixel density of the Lumix is 24x that of the Nikon D80) is probably just too small to get really good low-noise IR photographs. Exposing at the red-end of the spectrum exacerbates noise for the reasons explained here. However, I am now able to say that shots can be processed to get much better results than might be expected from my early efforts and the amount of noise generated.

A colour version of a test image manipulated using control points in Viveza 2
A black-and-white conversion of the same image in Silver Efex Pro
The jpg produced by the camera
A quick shot between showers last weekend with white balance set on grass in sunlight a few seconds before
I could not make local adjustments with this level of noise
After global and local adjustments in Define 2, Viveza 2 and Sharpener Pro 3
The enlarged images of noise before and after shown above are from these images
Ignore the subject (I didn't want to get wet getting something more photogenic and the manipulation achieved. This is just to show the sort of effect I can now get from an almost infinite range of global and local adjustments